Showing posts with label DIY. Show all posts
Sunday, November 3, 2013
Halloween Monsters
Made these Halloween Monsters for the kiddos at work. No food gift that is sure to put a smile on any child's face. I bought the bubbles at Target in the kid party section and the googly eyes at dollar tree. Using a hot glue gun add the eyes and with a sharpie draw the mouth. My kiddos loved these silly Halloween Monsters.
Thursday, July 18, 2013
Easy-to-Make Chalkboard
I’ve wanted to make a chalkboard for a long time now and
finally got around to making one. It was simple and quick to make. I’ve seen
lots of different chalkboards made from frames you can buy at your local craft
stores, but I found that the size of frame I would need would cost a lot. I went looking at my local thrift shops and came across this simple frame.
Local thrift shops carry a variety of unique frames of all different shapes,
sizes, and colors for cheap. You are sure to find one that works for you. Plus if it
isn’t in the color you like, you can always paint it!!! You just have to be patient
when looking. When I initially started this project, I made my own chalkboard
paint using a recipe I found online, but found that it didn’t work very well. I
decided to buy chalkboard paint at Joann (my local craft store) and it worked
100% better. I found through this project that it was also cheaper to use the
chalkboard paint from my local craft store (Joann). If you have a local craft
store like Michaels or Joann, these stores usually have a 40% and 50% off
coupon that you can use to buy the chalkboard paint.
This easy DIY is to show you how simple it is to make a
chalkboard once you buy your frame from the store or thrift shop.
Materials
Frame with cardboard
backing
Chalkboard paint
(bought or made)
Paintbrush
Newspaper
Chalk
Directions: Take out the cardboard backing from the frame.
Set out the newspapers and place cardboard on top to insure that the chalkboard
paint does not get on your floor. Using the paintbrush, paint the chalkboard paint onto the cardboard
(follow directions on store-bought chalkboard paint if you are using this type of paint). Let it dry and place
cardboard back into the frame. Add your quote or drawing with chalk.
Lots of love,
Kate
Saturday, May 25, 2013
52 Reasons We Love You - Teacher Gift Idea
I
saw this idea awhile back and thought it was so cute. I decided to take this
idea and make it bigger. Bigger cards that is. I was student teaching in a
classroom and wanted the students to write two reasons why they loved their
teacher. They wrote it down on the worksheet page. I cut them out and glued
each one to a card (depending on the age of the students, the students could
probably do this step). I used the hole puncher and binder rings to bind the
book together. This was the finished product. It turned out AMAZING!!!
-Kate-
Materials:
- Piatnick Giant Size Playing Cards (bought through Amazon)
- Binder rings
- Glue stick
- Construction paper
- Scissors
- Pencil/pen/marker
- 52 reasons page worksheet (click here for printable)
- 52 Reasons We Love You label (click here for printable)
- Hole puncher
Friday, February 8, 2013
Have a COLORFUL Valentine's Day {DIY & FREE Printable}
Valentine’s
Day is almost here!!!!
I just love
this holiday because of all the hearts. This idea is a great way to give
Valentines to the kiddos without giving them the unhealthy sugars. It also encourages
creativity because the kiddos can use the hearts to draw with. I first came across
this on The Long Thread and thought it would be fun to make. I went to my local HomeGoods and found a
package of 12 Mini Silicone Baking Cups in the shape of a heart for $5.99. It
was a little pricey but I figured it was a good investment because I can always
reuse them. I had a box of used crayons laying around my house that I used as a
child and decided to use them for this project. This was an easy and sort of inexpensive
project to make fun Valentines for the kiddos. Get the FREE printable I made by
clicking right here.
Materials:
Heart shaped
baking pan or silicone cups
Cookie sheet
Crayons (lots
of them)
Ziploc
sandwich bag
Valentine’s
Day printable
Scotch tape
Oven
Instructions
Step 1: Peel
off wrapper of crayons (I found the Crayola crayons gave the best pigment and
use lighter colors)
Step 2:
Place crayons in the Ziploc sandwich bag (the crayons should not have their
wrapper on them)
Step 3: Break
the crayons in the Ziploc sandwich bag until they are little pieces.
Step 4:
Preheat oven to 275 degrees F
Step 5:
Place the crayon pieces into the heart shaped baking pan/silicone cups (if
using the silicone cups place them on a cookie sheet before placing into the
oven)
Step 6: Place
the pan into the oven
Step 7: Leave
for 5-7 minutes (checking occasionally until melted)
Step 8: Take
out of oven and let stand until it dries
Step 9:
While waiting for the crayons to dry, print out the Valentine and cut
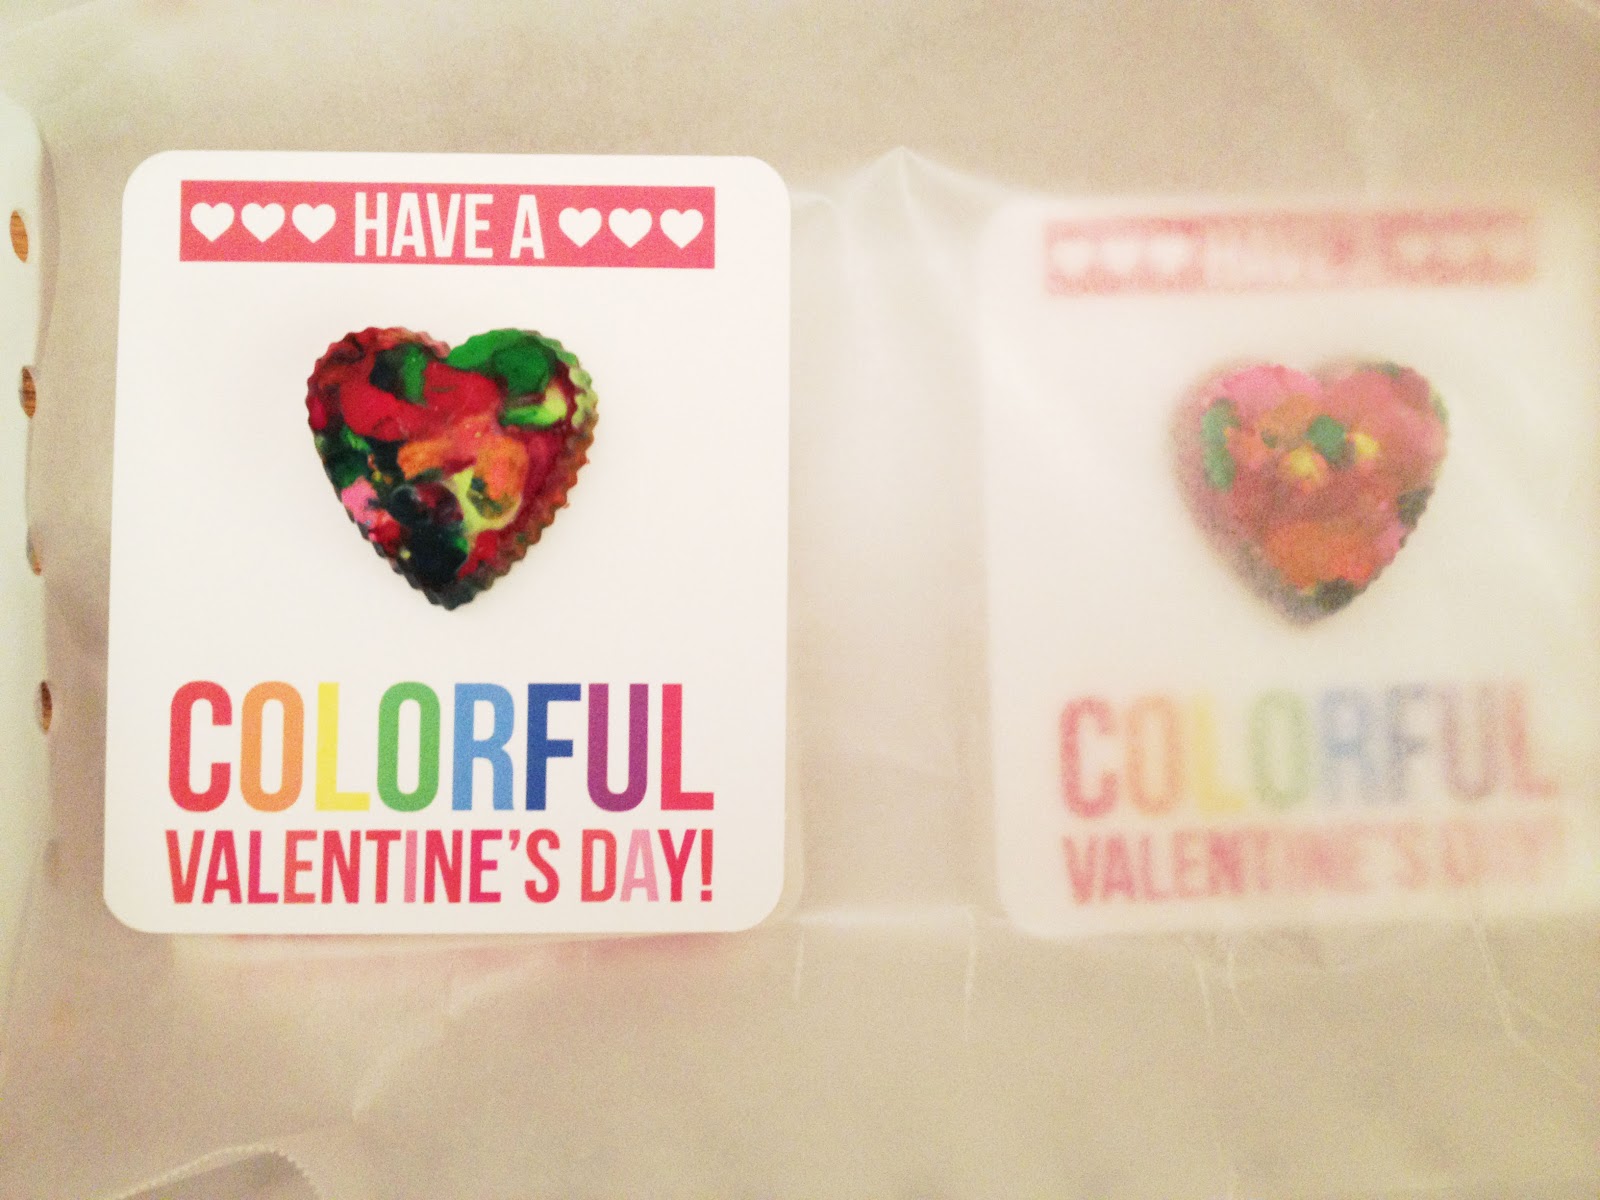
Step 10: Pop
out the crayons and attach to Valentine with scotch tape.
Tip: When transporting them to your designated location, make sure to separate each Valentine with wax paper so the crayon does not transfer to the other Valentines.
I hope you
enjoy this diy and you even get a FREE printable too!!!! Happy Early Valentine’s
Day from me to you.
With love, Kate
Labels:
DIY,
free,
hearts,
love,
printables,
Valentine's Day
Subscribe to:
Posts (Atom)